

How To Create An Online Application For A Website
How to create an online form in 2 minutes
Check out these expert tips for building a beautiful form and sending it to anyone, fast.
Not already signed up for Wufoo? Let's get started!
How to create an online form in 2 minutes
How to create an online form in 2 minutes
Watch: Build a form in 2 minutes
You need to create an online form, fast–whether it's to put up a simple contact form on your website, taking online orders and payments, collecting RSVPs, or capturing leads.
Good news: You can create an online form in literally minutes (did our title ruin the surprise??). Let's spend even less time showing you how by walking through a few simple steps!
Step 1: Create a new online form
To create a brand-new form, click the Forms tab and then click + New Form.

Once you've created the form, it'll default to the title: "Untitled Form." Probably not what you want, right? To change the form title, simply click on it. You'll then be taken to the Form Settings where you'll see the Form Title field that'll allow you to change the title to whatever your heart desires.
Note: While you're in Form Settings, you can edit all sorts of form preferences, such as adding confirmation text or redirect when your form is submitted. You can also add Google Analytics tracking to measure form behavior and performance–and set up a customizable confirmation email to send after someone submits your form.
Step 2: Add fields to your form
Now it's time to add some fields. To add fields, first click on the Add a Field tab. You can then either click on a field to add it to your form, or drag and drop it to any location on your form.

Once you have the fields you need, click on the field to customize it. Each field has different options to play with, but you can always change the field label, make it required, add instructions, and use CSS keywords to place your fields next to each other in the live form.
Step 3: Customize the form-taking experience
When we talk about how to make a form, we can't dismiss the more advanced features like conditional logic. Our Rule Builder allows you to show and hide fields, making sure users see questions that are relevant to them–saving them time. This helps you send users to different pages, or send different confirmation texts and emails depending on how the user fills out the form. The Rule Builder is divided into three main rule types:
- Field Rules let you decide which fields you show—and which you don't—depending on who they are or how they fill out your form.
- Page Rules allow you to configure the page that form takers see next, based on how they complete your form.
- Form Rules help you customize how you follow up with each form taker once they submit your form. Your options include sending an email, redirecting them to another web page, or showing a confirmation message.
Step 4: Skip steps 1-3
How to create a form without creating it yourself. It's possible, and it's less confusing than it sounds.
You can do it by simply using any of our 400+ pre-built form templates ! They're ready to be used, but you can customize them however you'd like. We'll leave it up to you. 🙂
Step 5: Share your form
You have a variety of options when it comes to getting your form out to the world–from sharing a direct link to embedding it on a webpage. Check out all of your options by clicking on the "Share Form" button at the bottom right of your form builder page.Alternatively, click on the "Share Form" icon that becomes visible when you hover over the form in your Form Manager.
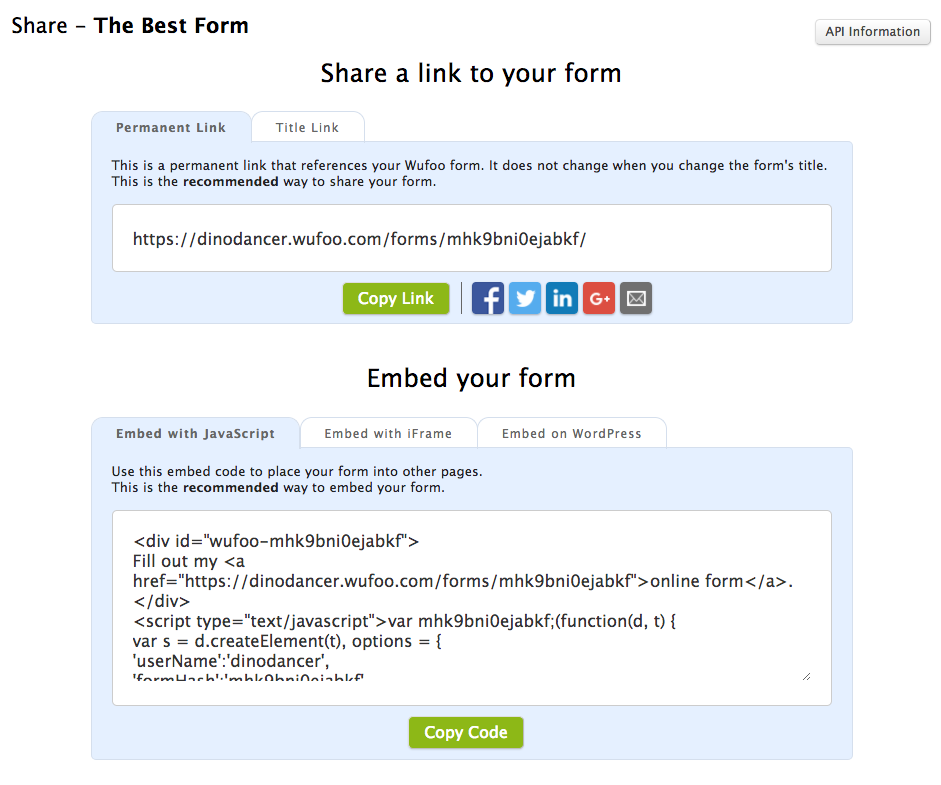
You can get a permanent link to your form or a title link that uses the name of your form. If you want to start sharing even faster, click to share your form on Facebook, Twitter, LinkedIn, Google Plus, or email. Or embed your form directly into your website by grabbing an embed code.
Ok, check your watch. Hopefully, no more than a few minutes has passed since you began this article. But hey, even if it took longer, now that you know how to create a form, it was worth it.
How To Create An Online Application For A Website
Source: https://www.wufoo.com/guides/how-to-create-an-online-form-in-2-minutes/
Posted by: powellagar1989.blogspot.com
0 Response to "How To Create An Online Application For A Website"
Post a Comment